SharePoint's new Page Templates are awesome and everyone should be taking advantage of their features. I've been using SharePoint pages a lot to build our corporate intranet but the templates take this to a completely new level. Now I can use it for inventory purposes too.
Understanding Inventory Types
When it comes to inventories, sometimes you want something complex that will let you do all kinds of computations and exports. Computer and phone hardware inventories are like that, and they're best done as SharePoint lists.Sometimes however, your inventory object means more simply by itself. Sometimes you need to be able to write a whole heap of "free text" around it. Good examples of this could include domain name inventories and IT only contacts. These kinds of things work very well in SharePoint as templates.
In this post, I want to show you how you can build your own inventory page.
Create a Page
I'm going to assume that everyone already loves pages (because they're awesome) and knows how to create them in SharePoint. In case you don't this is a very quick guide;
- Go to any modern SharePoint library (or to the SharePoint part of your Teams group)
- Click on the Square Icon in the upper left hand corner to make sure that you're on the home page.
- Click New, then Page.
- Type a name for the page (I always try to type a short name and then rename it later, so that I get nice URL)
- Put any information you want on the page.
- Click Publish.
Set up your Page
Set your page up how you want it. In my case, this means that I'll put links to the main menus of my sharepoint site (Site root and inventory section). It means that I'll put all the headings in and that I'll use the SharePoint Headings Styles for the sections.
Using the heading styles enables me to get URLs to the anchor points on the page copy them to the clipboard and use them to build the menu on the left (be sure to edit out the majority of the URL so that it is just the hash and whatever is after it in the link (ie: #Security).
 |
| My Domain Inventory Record - Click to see full size |
Save the Page as a Template
When you're happy with the way your page looks;
Click the down arrow next to Save at the top of the page, and click Save as template.
You'll be prompted to give your template a name.
Using your Template
To use your template;
1. Go to your site and click New, then Page.
2. You'll see an option to choose a template. (This is why you named it).
3. Click on your template.
4. A new page will appear, ready for you to use.
 |
| Having a Pre-Populated template makes navigation easier. |
5. Fill out your template and save it.
Creating a Full Inventory List
So, now you've created a single inventory item. It links to the parent page and it's fully searchable on the SharePoint site. The next step is to link it to the parent site to provide downwards navigation.
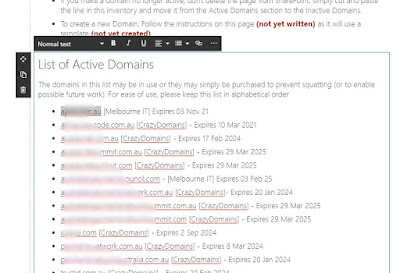
On the inventory page of my SharePoint site, I've got a list of domains (apologies for the blurring in this example). Now, I want to link my domain record to the list.
To do this,
1. Put the page into edit mode,
2. Highlight the text you want to link.
3. Click the chain (link) icon on the text formatting bar.
4. Locate the page you want linked and click on it.
5. Click Save.
6. Repeat this for any other pages you want linked.
7. Click Publish / Republish on the page.


Comments